“Storm Jacket Camera Covers by Vortex Media” plus 1 more: Digital Photography School | |

Posted: 14 Jun 2011 12:48 PM PDT Shooting on rainy or snowy days can result in some amazing images but also in accidental damage to your equipment. Whether you do nature or street photography, limiting yourself to getting out on dry days can be very frustrating. I finally added a camera cover to my gear! Like many of you, until recently I had been using makeshift plastic covers from bags, shower caps, etc. They work in an emergency situation but, to be honest, they are not always a dependable solution to protect your expensive gear… I recently discovered the camera covers by Storm Jacket. They come in a variety of sizes (depending on the lenses you use). They also come in Standard and Pro models.  Here is the scoop: The Storm Jacket is made of AquaNylon fabric and features a bungee draw string on each end. It fits securely over your lens cap and stays in place. The other end also features a draw string which can be pulled tight between shoots when walking around on a rainy or snowy day. The difference between the standard and pro models is the ability to use a tripod with the pro model. The Pro Storm Jacket has the added feature of a Velcro opening on the bottom to allow for the mounting of a tripod or monopod. I also recommend the pro version if your camera strap connects to you tripod socket. I use a BlackRapid strap on my main camera and the the Pro Storm Jacket fits perfectly. - The Standard model comes in five sizes (from 11" to 31" or 27.9 cm to 78.8 cm), in yellow, red, black or camouflage. - The Pro model comes in four sizes (17" to 31" or 43.1 cm to 78.8 cm) in black or camouflage. In order to choose the length you need, you just measure the length from the front of the lens cap (zoom fully extended) to the rear of your camera and add 2 inches to that number. The model I chose can fit both my 70-200 mm f/2.8 (pictured here) and my 24-70 mm f/2.8. If folds flat, weighs almost nothing and comes with a small zippered pocket that can hook on to your belt or camera bag. The only drawback I can think of is that is it not clear. There are clear covers available out there but they are definitely not as durable as the sturdy fabric used on the Storm Jacket. I can see this lasting for many years in harsh conditions. I have only used it on rainy days so far but I have many months of snow to look forward to in Minnesota! To find out more about the Storm Jacket by Vortex Media click here. Prices vary depending on the model/size and range from $36 to $59 with some good deals on Amazon. Post from: Digital Photography School's Photography Tips. Check out our resources on Portrait Photography Tips, Travel Photography Tips and Understanding Digital Cameras.  Storm Jacket Camera Covers by Vortex Media |
Posted: 14 Jun 2011 07:29 AM PDT Take a look at your DSLR camera strap. If you are using the strap that came with your camera, you might notice a little piece of plastic or rubber on one side of the strap. Have you ever wondered what that was for? (If the answer is “No” then it might still be sitting your camera box!) That device serves a simple purpose that I’d guess 95% of DSLR photographers never consider. Its sole purpose is to cover the eyepiece on your camera and most photographers have never used it, though it can be useful. Even without using that actual device, covering your eyepiece, when your face is not already covering it, can be helpful to gaining proper exposure. The problem comes from the fact that your camera’s light meter is deciding what your shutter speed, aperture and other settings will be. If you are shooting in Manual, this will not be an issue. Also, if you are shooting in LiveView, this will also likely not be an issue. And here’s a quick drawing of why and how taken from a post on my blog entitled “How Your Camera Works“. (Red is the sensor, Blue are the shutter curtains, Green is the mirror, Yellow is the aperture, Orange are the lens elements, Purple is the focus screen and Black is the pentiprism).  Light typically comes into your camera from the front lens and does all that fancy bouncing before getting to your eye. Sometimes the light meter in your camera is located just before the eyepiece and sometimes it is located just behind your semi-translucent mirror, if you have such a mirror. Either way, it is located in the light path. The problem is light can travel in your eyepiece as well as out of it. Now the amount of light hitting your meter is increased, changes your meter settings and thus your exposure settings in Auto, Program, Shutter and Aperture Modes (and likely in the other "Scene" modes as well). This might be only a minor change or something more nefarious. To demonstrate, I shot some samples in broad daylight to start. The first sample set is with the sun at my back but high in the sky, with the camera and target both parallel to the ground. This is a likely scenario for most shots. 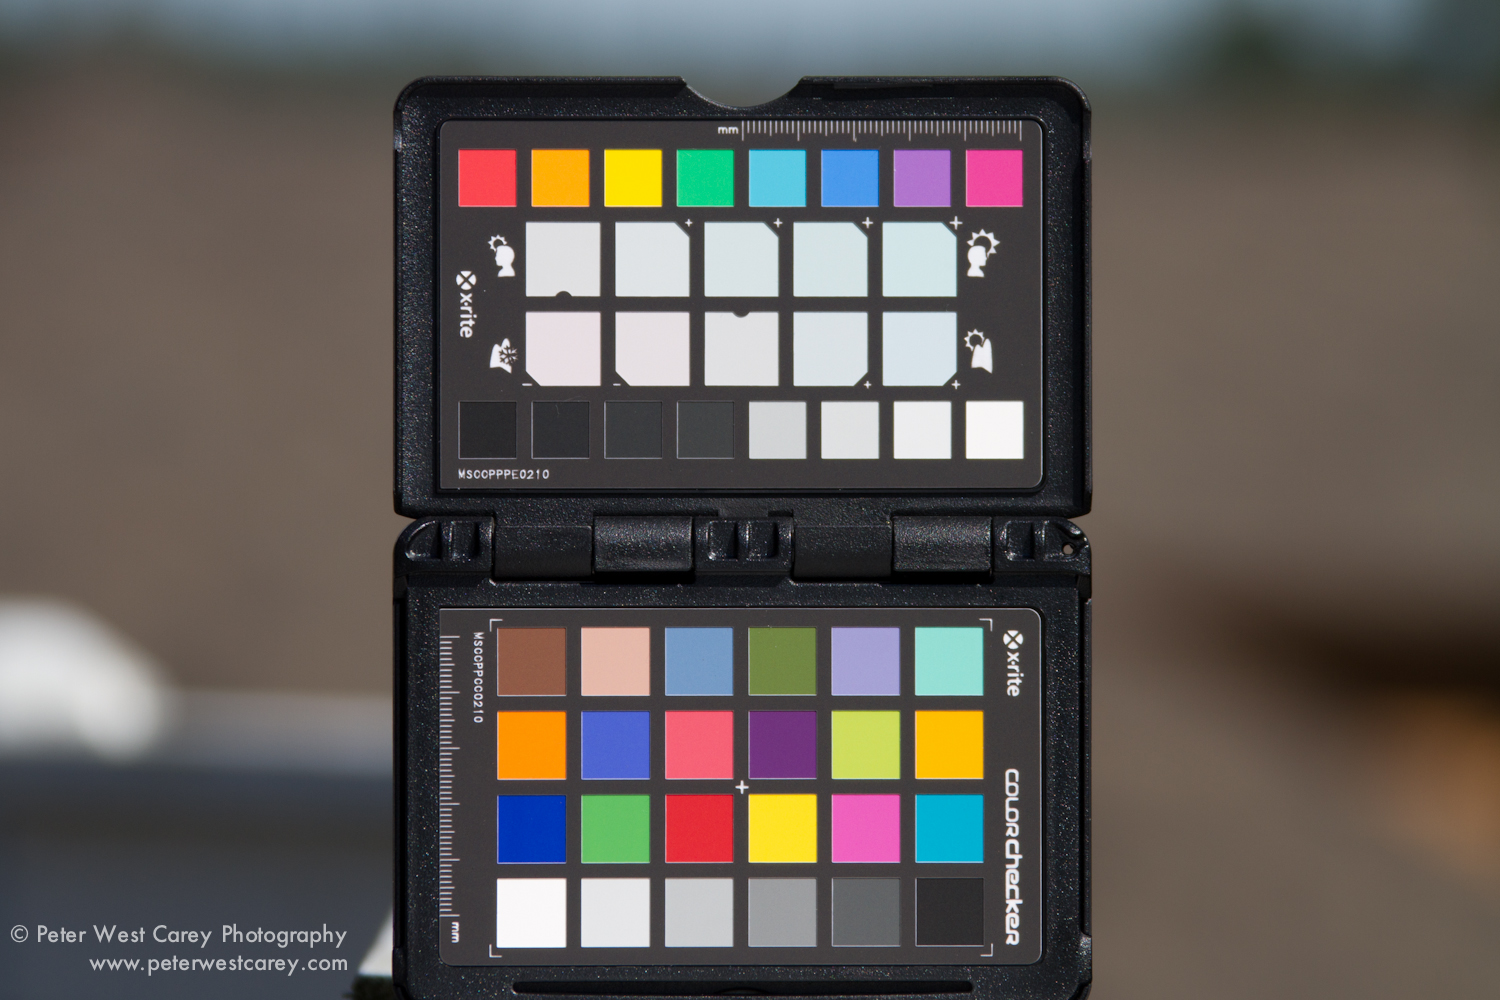 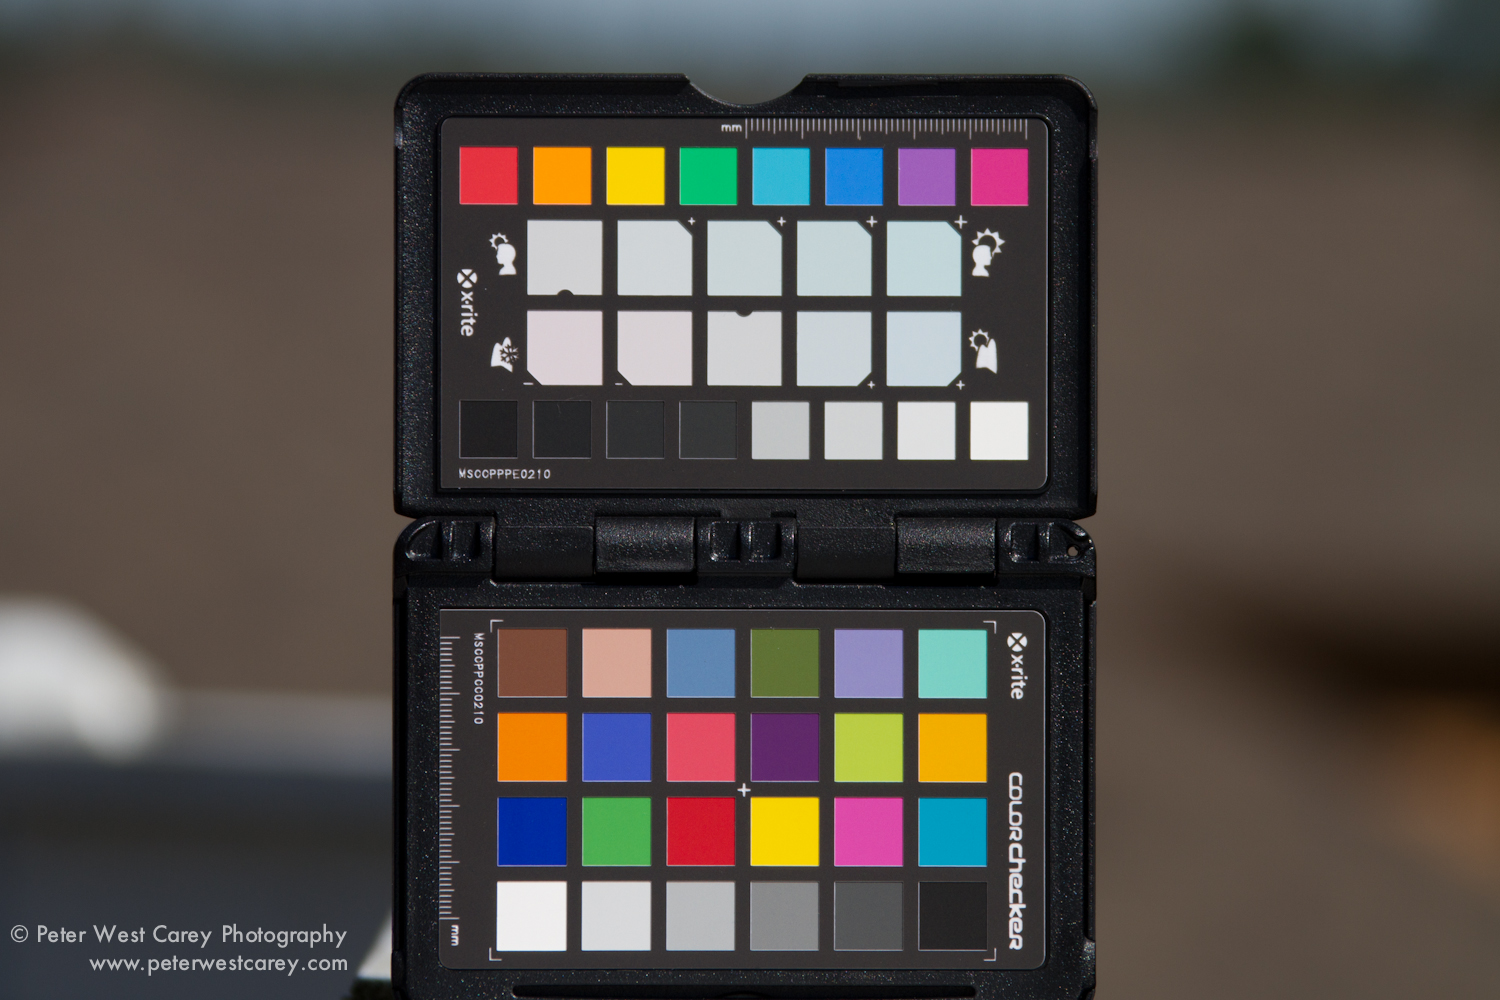 Next, the same shots except this time I set the camera up so it is directly in line with the sun and the target. The first shot is with my eye in front of the eyepiece, then I am off to the side and finally, in the third image I am standing about one foot behind the camera, shading it but not holding my eye up to it. 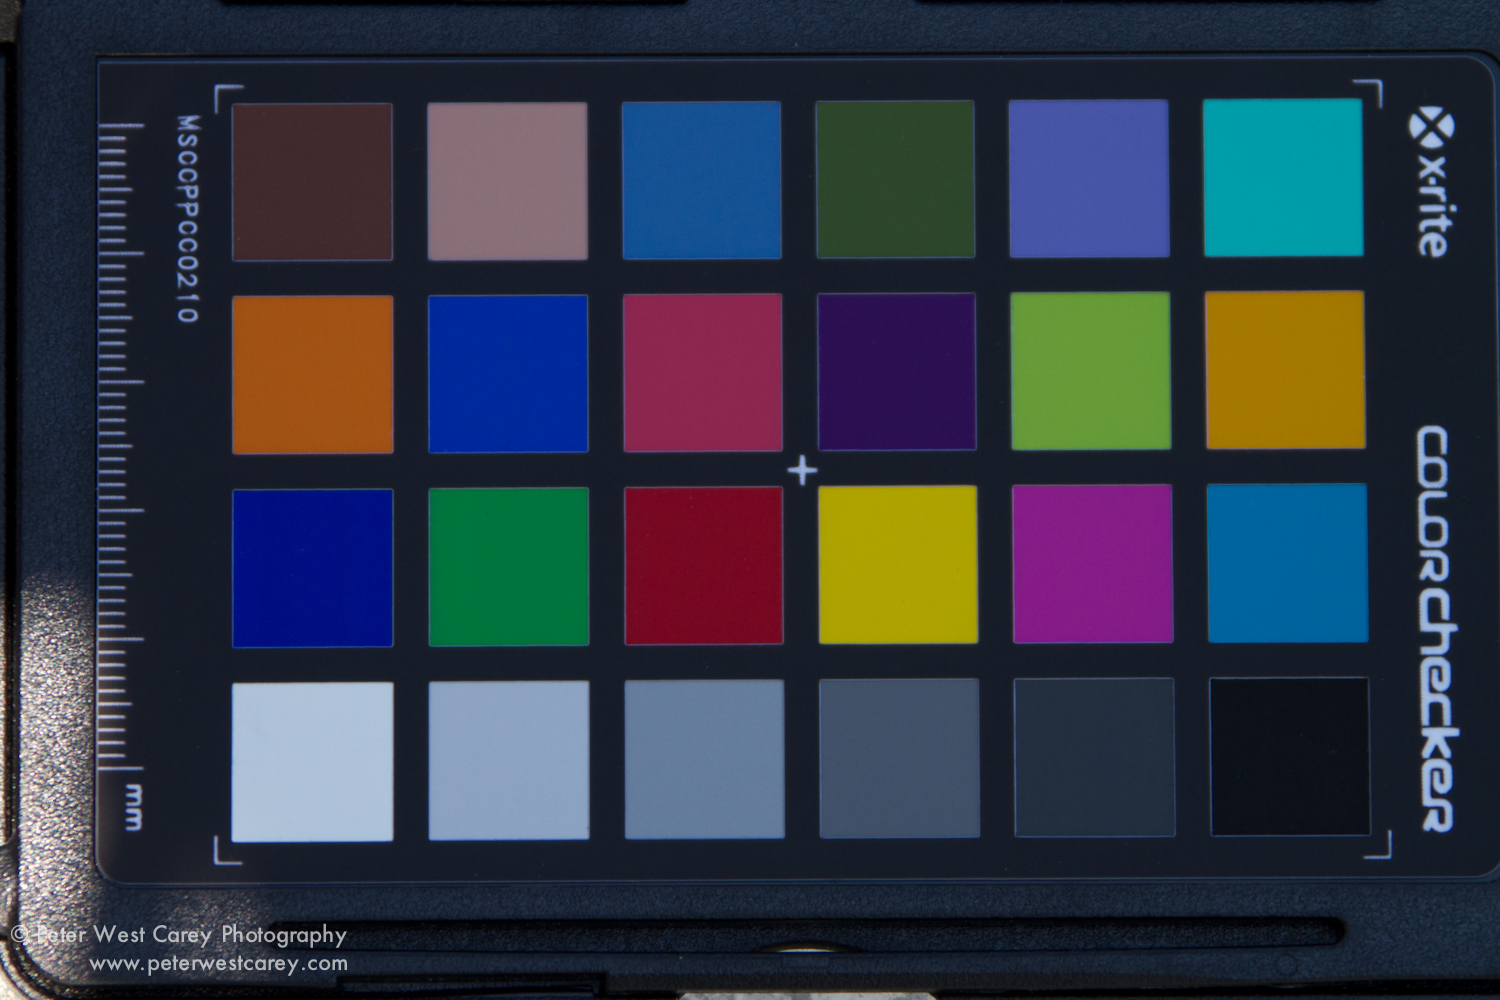 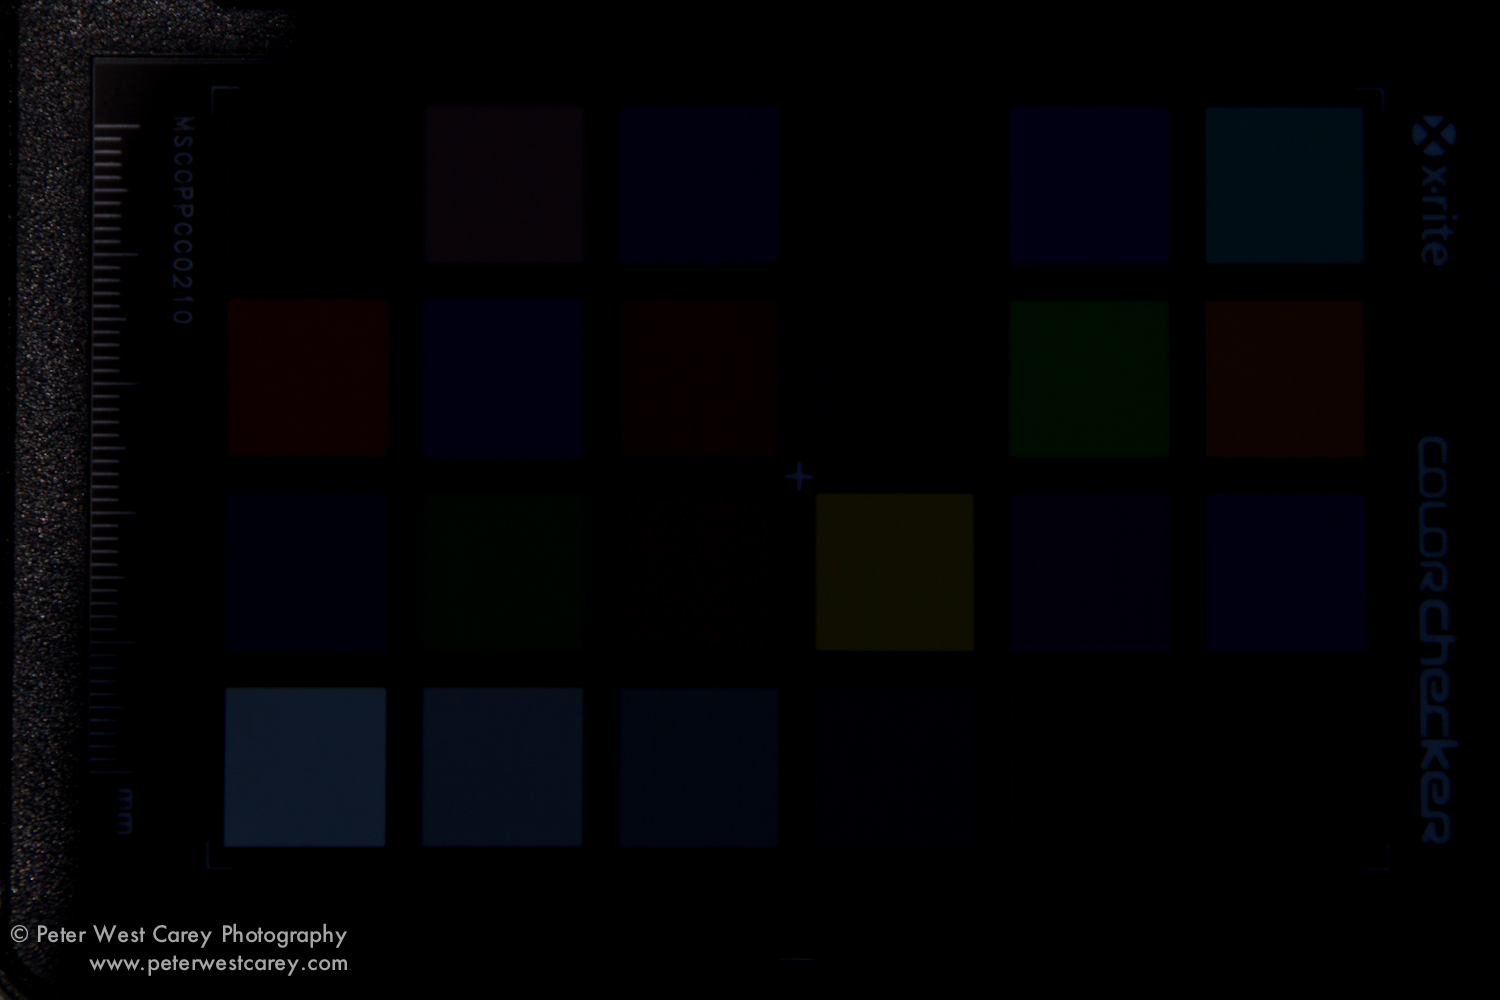 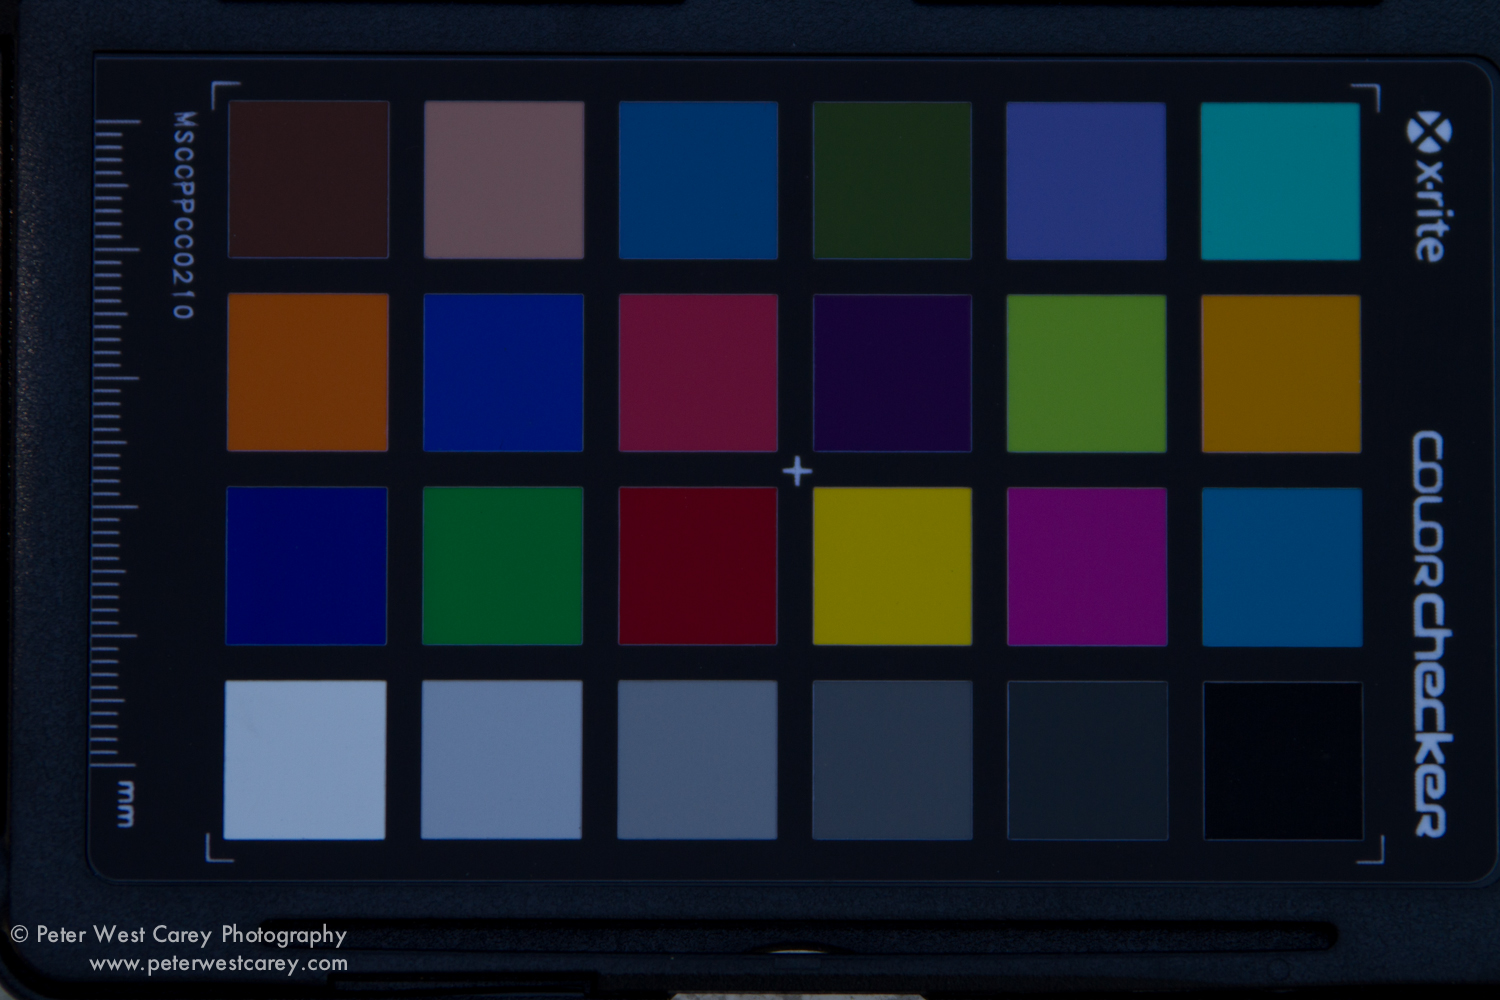 The shot data for each image is ISO 100 and aperture of f/5.6. The shutter speeds vary from 1/250 to 1/5000 to 1/500, respectively. This means if the camera is set to expose properly when my eye is in front of the eyepiece, then with direct sunlight hitting the same eyepiece, it will under expose by 4 1/4 stops. Even just standing back from the camera results in a full stop more light being metered. Finally I took some shots of a cat. His name is Mocha. He’s a cranky cat but once in a while he sits still. This shot is inside with less rigor in regards to the test. There are large windows behind me and the sun is off to the side of the windows. It is a cloudy day with tons off diffused light, also coming in through a skylight. See if you can guess which shot is which. 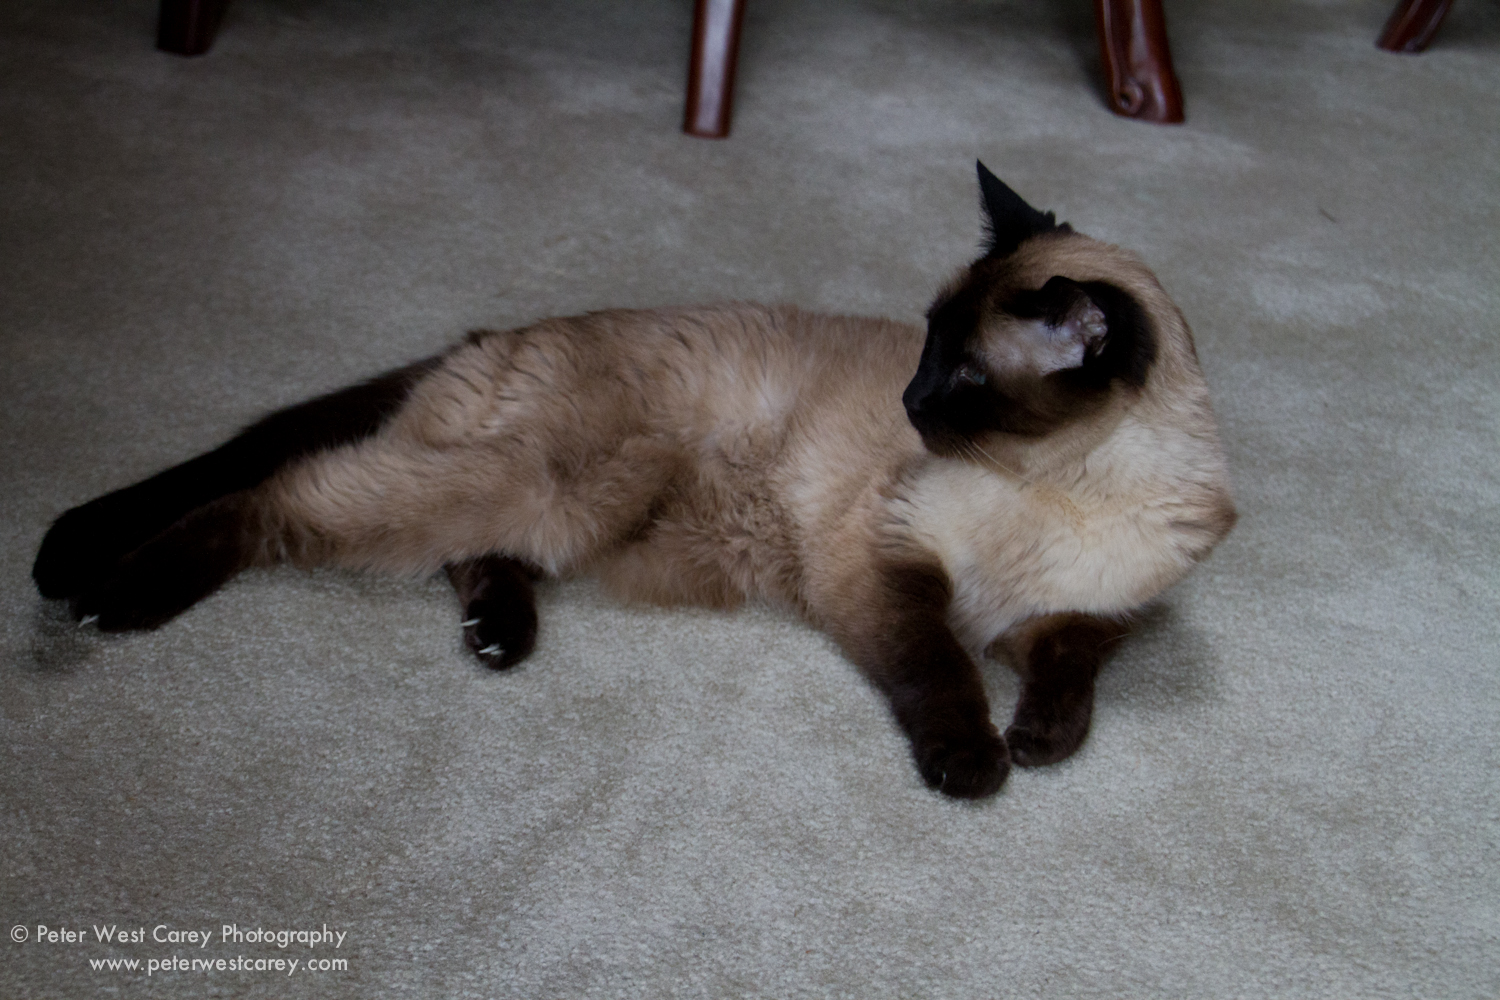 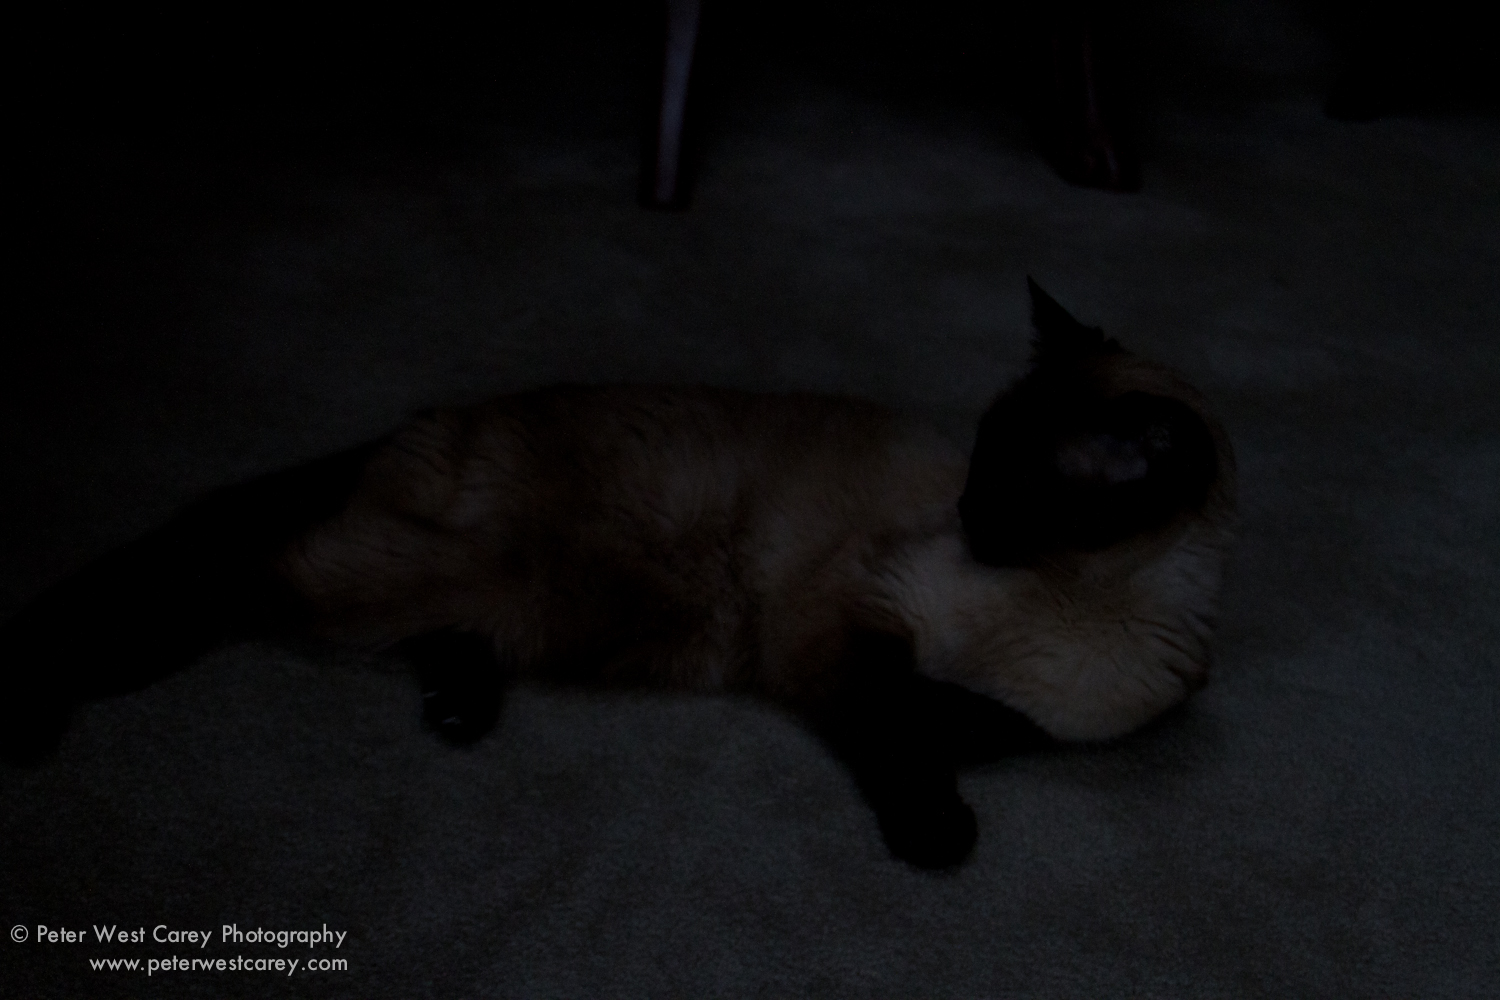 The data: First shot ISO 2000, f/4.5 and 1/160. Second shot ISO 2000, f/4.5 and 1/1250. That’s a three stop difference in a diffused light situation. Even if you don’t use the supplied eyepiece cover (which usually requires removing the attached eyepiece), be cautious of the light entering the back of your camera. It could be the reason why some of your photos are coming out dark. EDIT: As some requested, here is another photographer’s photo of the eyepiece cover I am speaking about. http://www.flickr.com/photos/hpulley/4830737083/ I am traveling at the moment and do not have my cover with me. Post from: Digital Photography School's Photography Tips. Check out our resources on Portrait Photography Tips, Travel Photography Tips and Understanding Digital Cameras. Cover Your Eyepiece |
No comments:
Post a Comment